Wednesday, October 6, 2010

Canning Beef

Yes!  You, too, can can beef.  haha That sounds funny.


London Broil was on sale here for $1.97/pound, so I decided to try canning it to have on hand.  I borrowed my sister's pressure canner (you can get it on Walmart site-to-store for around $85  ).  You might also want to invest in a canning set that has a funnel, magnet, etc.  There are a few reasons I like that specific one: 1. It can hold 2 layers of pints. 2.  My local cooperative extension can calibrate it. 3.  It can be used on flat-top stoves.  4.  It's worked out well, is easy to open and close, and comes with clear instructions.


It can hold 7 regular quarts = 14 pounds of beef OR
20 regular pints = 20 pounds of beef
These instructions are specific to dial gauge canners and people at sea level (up to 1000 feet).


You want to select a type of beef that is low in fat, or have the fat trimmed off.  Ask the butcher to cut the meat into chunks about 2-inch squares.


Sterilize your jars - I just put them on rinse cycle of my dishwasher with warming on.  When your jars are ready, put a pot of water on the stove, and place your seals in the water.  Heat the water, but do NOT boil it.  This will soften up the seals and sterilize them.


Put the jars on a dishcloth on your counter.  Open your beef, use your funnel and put the beef in the jars.  If you want it salted, put the beef in a bowl and use canning salt about 1 teaspoon per pound.  Regular table salt will make your beef cloudy and not appetizing.  You can brown your meat first, but I thought it turned out great without cooking it first, and obviously much easier and less dishes to do.


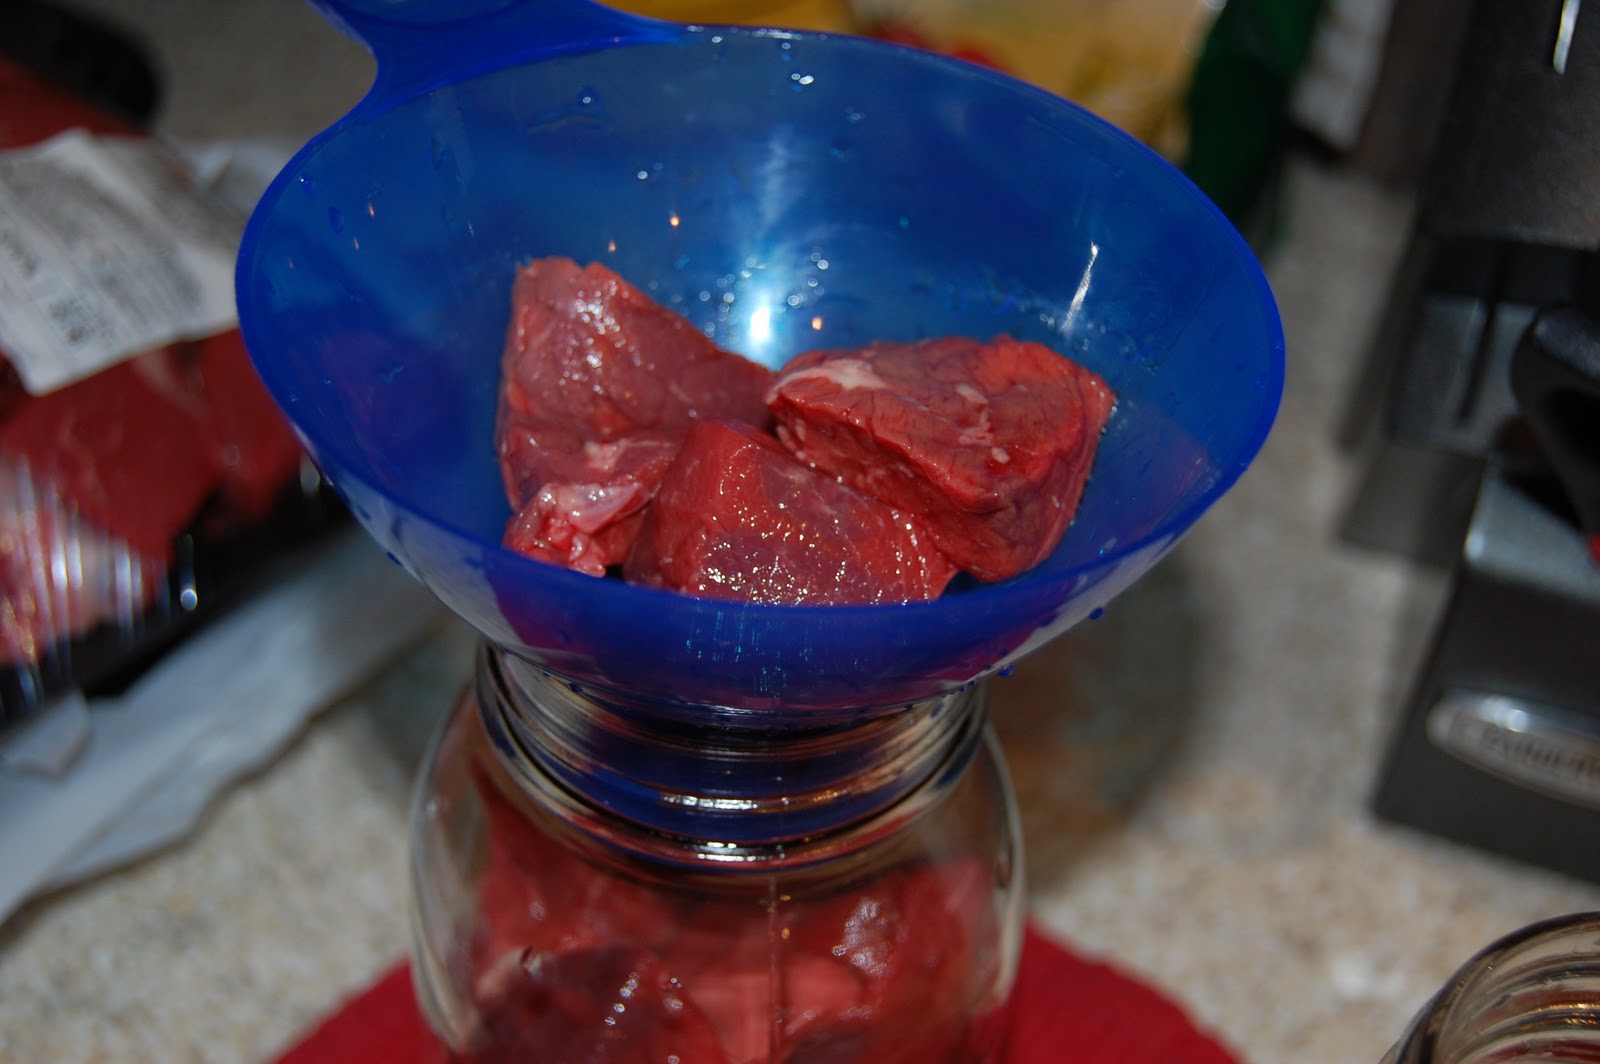
Pack the beef in there really tight with a sterile spoon handle.
See how tight it is packed?  Leave 1 inch headspace at the top.  Do not put any liquid in at all.  Use a wet paper towel to wipe around the rims to clean them off before you put the seal on.


Use your magnet tool to place your seals on top of the jars.

Put the seals on the jars and then put the rings on the jars, not too tight.  Now you're ready to put them in the canner.  Put them in and close the lid (follow your canner's instructions).

Put the canner on the stove on high.  Wait until steam is constantly coming out of the open vent.  

Then wait another 10 minutes.  

THEN, close your vent and let the pressure build to 11 pounds of pressure.  Keep it at 11 pounds of pressure or more for 90 minutes (for quarts) or 75 minutes (for pints).  If you mixed sizes, use the longer time.  If it goes below 11 pounds of pressure, you have to start timing over.  You don't want it to go too high or it could explode!!!  So just keep an eye on it, eventually you'll probably turn it down to low and it will stay between 11 and 15 pounds.
When the time is done, turn off the heat.  Wait for the pressure to go down to 0, then wait 2 minutes, then open the lid but be very careful of steam.
And, voila, you have:
And then you can have:
(This is a green chili burro - meat, can of green chilies, and cheese warmed in the microwave, add sour cream and enjoy!  Yummy fast meal, thanks to our hours of canning. :)
Happy Canning!


Halloween Lanterns

I got this idea from a food blog, which happens to have some cute holiday ideas as well.
http://www.ourbestbites.com/2009/10/crafty-in-kitchen-mason-jar-lanterns.html and she got it from here: http://notsoidlehands.blogspot.com/2009/09/freecycle-friday-glowing-jack-olantern.html

So I started by going to the Dollar Tree and getting a bunch of food items in plain jars.  I removed the labels and dried the jars and I was ready to get started.  You could use canning jars, but I wanted mine to be completely smooth without any letters on the glass itself.

The you choose some tissue paper (white can be ghosts, mummies, or skeletons, orange can be pumpkins, green can be frankensteins, and purple can be goblins or monsters).  Cut the tissue paper into strips about 2 inches wide.

Using a foam paint brush, paint one stripe of mod podge down, apply one strip of tissue paper.  Continue around the jar, overlapping the strips, going about halfway up the rim of the jar.  (If you are doing the mummy, do the strips of paper horizontally instead.)

Put jar upside down to dry (don't want it sticking to the table).
You might want to print out these faces first and decide which jar each of them will go on, and match the tissue paper to that color (unless you know how to resize these faces, which I do not...)  For instance, the Frankenstein face prints out pretty big, so it would be best to use a larger jar for that.

Paste your faces on - if they are out of, say, felt, you can use a hot glue gun, if they are out of paper or thin cotton, you can use your mod podge.

You have a few choices for the tops.  You can spray paint the lids to the jars, and just put those back on (make sure the tissue paper goes up far enough), you can paint the rims, or you can put ribbon around them.  If you're crafty, you can probably come up with 10 more ways to finish them.  I used ribbon since I already had it.  I wrapped them around several times.


 Cute project, cute gifts, and lots of fun!


Tuesday, July 20, 2010

BBQ Chicken Pizza

I adapted this recipe from this one: http://www.eatingwell.com/recipes/smoky_corn_black_bean_pizza.html

1 cup canned black beans, rinsed
2 roma tomatoes, chopped
2 cobs of corn, cut the kernels off
1/2 cup barbecue sauce (or more to your liking - I used Bill Johnson's)
1 cup cooked chicken
1 cup mozzarella cheese
1 premade pizza crust or your own pizza dough

Cook the dough according to instructions.  Spread BBQ sauce over top of crust.  Mix tomatoes, corn kernels, chicken, black beans in a bowl.  Spread over sauce.  Cover with mozzarella cheese.  Cook until melted and hot all the way through (about 17 minutes).

Variations:  Add some canned jalapenos to the mix.  Top with chopped avocados after you cook it.  Add cumin to the BBQ sauce.  Add red onions to the pizza.  There are lots of ways to do it!

Friday, July 9, 2010

Recipe: Apple Butter

A friend of mine gave me this recipe and I adapted it to make as much as possible in one batch.


about 24 medium apples (I filled up my crockpot)
2 cups sugar + 2 cups sugar
1 teaspoon pumpkin pie spice + 1 teaspoon cinnamon (divide up the spices however you want: cinnamon, pumpkin pie spice, apple pie spice, or anything else Smiley)


Peel and core the apples.  Place in crockpot.  Add first amounts of sugar and spice.  Cook on high several hours until it's very easy to break it up with spoon (it will be cooked down to less than half full at this point).  Meanwhile, sterilize your bottles (you can do it in the dishwasher and it can keep them hot for you). Add second amounts of sugar and spice.  Cook an hour more (or so).  When it's REALLY mushy, place in blender and blend up (might have to do it in batches).  Place your seals in hot, but not boiling water to start softening up the seals.  Pour into hot bottles (hot liquid has to go in hot bottles - don't place on cold surface or it could crack) leaving 1" at the top.  Wipe the edges of the bottles off so the seals can seal.  Place the seal on, and place the ring on loosely.  Place them in the water bath canner (can't be touching each other or the bottom).  Fill with water, at least 1" over the top of bottles.  Bring to a rolling boil and boil for 10-30 minutes.

This recipe makes 8 cups (4 quarts) or you can 1/2 this recipe which would make about 4 cups of apple butter - if you don't want to can it, just store it in the fridge and use it within a few weeks.